


The Tutorial
Step 1
File - New - Open a new Transparent image 900 x 600 pixels
Selections - Select All
Open the background image - mnbackgroundbg
Edit - Copy
Edit - Paste - Paste into Selection on your working image
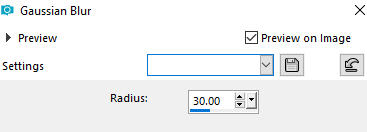
Adjust - Blur - Gaussian Blur (Radius 30)
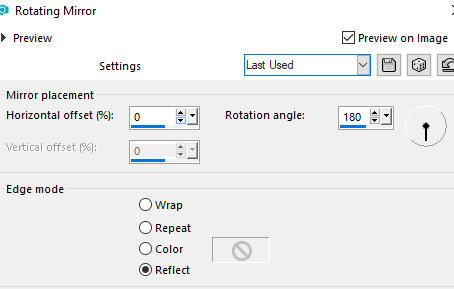
Effects - Reflection Effects - Rotating Mirror
Step 2
Layers - New Raster Layer
Flood fill tool / Fill in the layer with the Linear gradient provided (mngradient4.PspGradient)
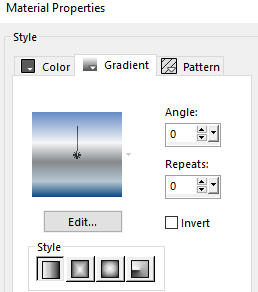
In your Layer Properties - set the Blend mode to Soft light
Step 3
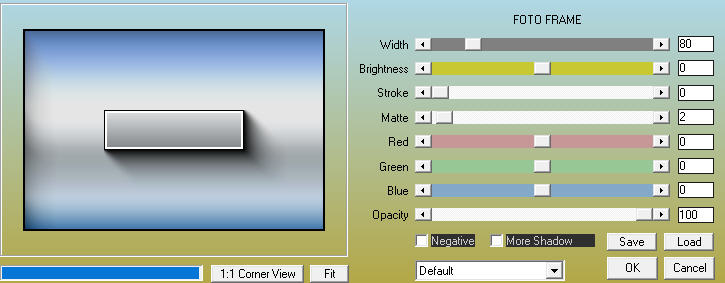
Effects - Plugins - AAA Frames - Foto Frame
Step 4
Effects - Plugins - Simple - Diamonds
Effects - Plugins - Simple - Zoom out and Flip
Effects - Plugins - Simple - Piza Slice Mirror
Step 5
Layers - Duplicate
Image - Mirror
In your Layer Properties - set the Opacity to 50
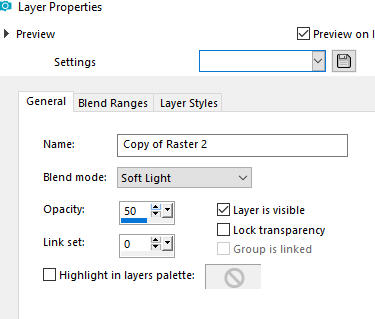
Layers - Merge - Merge Down
Step 6
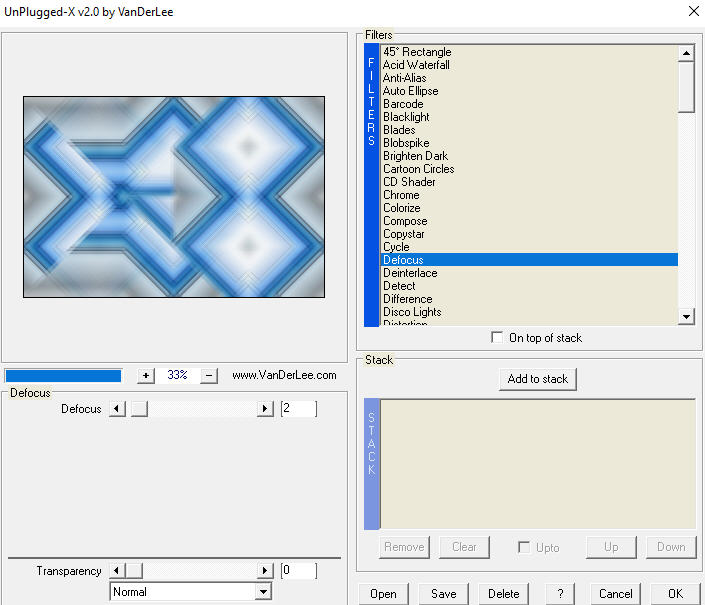
Effects - Plugins - VanDerLee - UnPlugged-X - Defocus - default settings
Effects - Edge Effects - Enhance
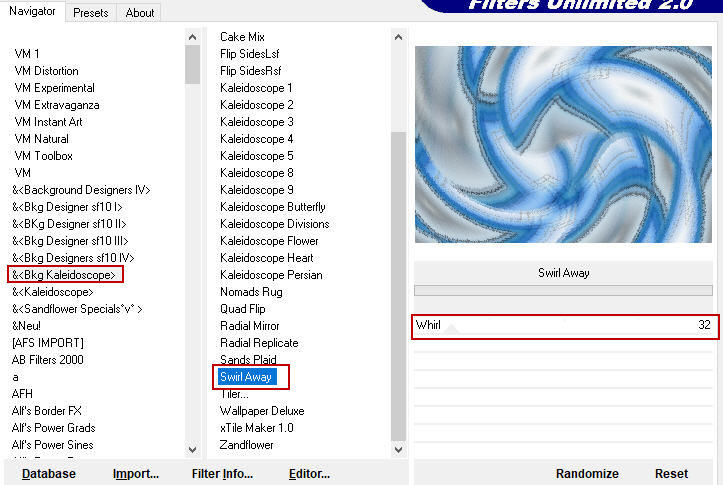
Effects - Plugins - <I.C.NET Software> - Filters Unlimited 2.0 - &<Bkg Kaleidoscope - Swirl Away Whirl
Step 7
Layers - New Raster Layer
Flood fill tool /Fill in the Layer with the Background Color color 2 -white #ffffff
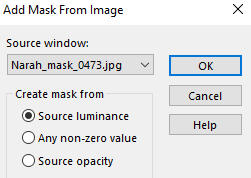
Open mask - Narah_mask_0473
Layers - New Mask Layer - From Image (Invert mask data not checked)
Layers - Merge - Merge Group
Image - Flip
Image - Mirror
In your Layer Properties - set the Blend mode to Luminance (Legacy)
Effects - 3D Effects - Drop Shadow (0/0 /75/45) color 3 - #234858 - Shadow on new layer not checked

Step 8
Open tube - SKF_Flower117.07
Edit - Copy
Edit - Paste - Paste As New Layer on your working image
Activate the Pick Tool (K)![]() - Enter these values for positions X and Y on the Toolbar:
- Enter these values for positions X and Y on the Toolbar:
X 516 Y -75
![]()
Step 9
Open tube - Alies 11VR27-woman-09112012
Edit - Copy
Edit - Paste - Paste As New Layer on your working image
Activate the Pick Tool (K)![]() - Enter these values for positions X and Y on the Toolbar:
- Enter these values for positions X and Y on the Toolbar:
X 14 Y24
![]()
Effects - 3D Effects - Drop Shadow (0/0/75/ 45) color 3 - #234858 - Shadow on new layer not checked
Step 10
Layers - New Raster Layer
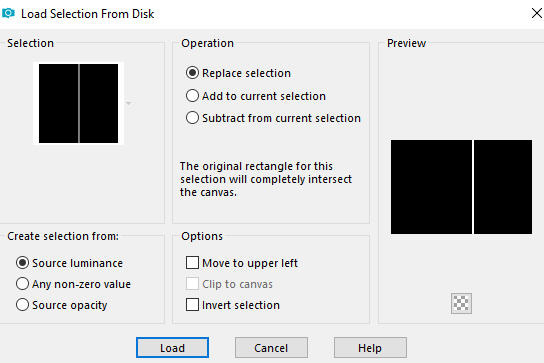
Selections - Load/Save Selection - Load Selection From Disk
Load selection - mnsel1_myway
Flood Fill Tool (F) - set the Opacity to 50
![]()
Fill in the selection with Background color 2 - white #ffffff
(Don't forget to set the opacity back to 100)
Step 11
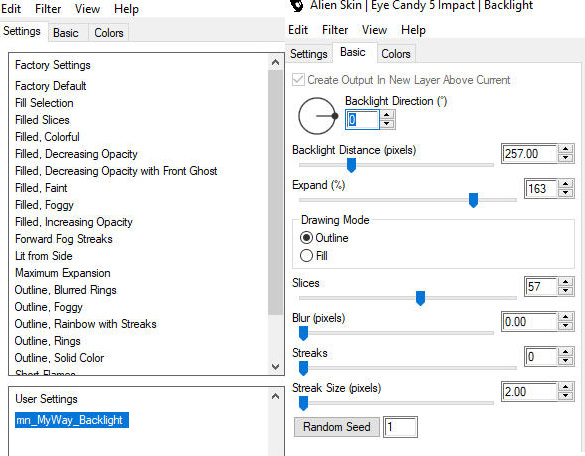
Effects - Plugins - Alien Skin - Eye Candy 5 - Backlight
In the User Settings look for preset - mn_MyWay_Backlight - provided in the materials - and click OK
Note: If the Preset doesn't work for you, use these settings in the Basic Tab:
Selections - Select None
Adjust - Sharpness- Sharpen
Step 12
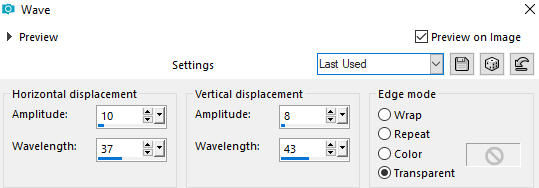
Effects - Distortion Effects - Wave
Step 13
Effects - Image Effects - Seamless Tiling

Step 14
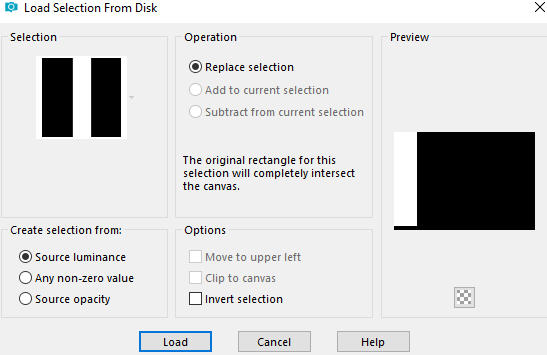
Selections - Load/Save Selection - Load Selection From Disk
Load selection - mnsel2_myway
Press Delete on your keyboard
Selections - Select None
Step 15
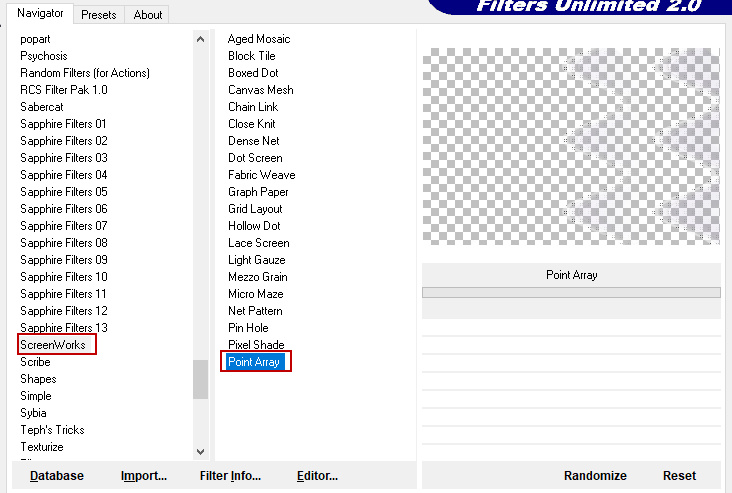
Effects - Plugins - ScreenWorks - Point Array
or
Effects - Plugins - <I.C.NET Software> - Filters Unlimited 2.0 - ScreenWorks - Point Array
Step 16
Open mask - !!!!.mask.ket-fadesuave-1
Layers - New Mask Layer - From Image (Invert mask data not checked)

Layers - Duplicate
Layers - Merge - Merge Group
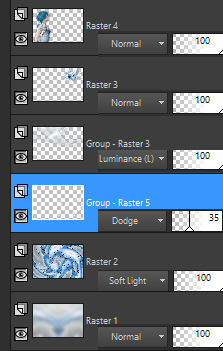
Step 17
Layers - Arrange - Move this layer (Group-Raster 5) down under the mask layer Group-Raster 3
In your Layer Properties - set the Blend mode to Dodge and the Opacity to 35
Step 18
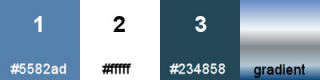
Image - Add Borders - 1 px - Symmetric checked color 1 #5582ad
Image - Add Borders - 3 px - Symmetric checked color 2 #ffffff
Image - Add Borders - 1 px - Symmetric checked color 1 #5582ad
Step 19
Selections - Select All
Image - Add Borders - 40 px - Symmetric checked color 2 #ffffff
Selections - Invert
Flood fill tool / Fill in the Selection with the Linear style gradient provided in the materials
Step 20
Effects - Plugins - I.C.NET Software - Filters Unlimited 2.0 - Bkg Kaleidoscope - Swirl Away - Whirl 32
Step 21
Adjust - Blur - Gaussian Blur (Radius 30)
Step 22
Effects - Plugins - ScreenWorks - Point Array
or
Effects - Plugins - <I.C.NET Software> - Filters Unlimited 2.0 - ScreenWorks - Point Array
Step 23
Selections - Invert
Effects - 3D Effects - Drop Shadow (0/0/55/35/) color black - #000000 - Shadow on new layer not checked
Selections - Select None
Step 24
Image - Add Borders - 1 px - Symmetric checked color 1 #5582ad
Image - Add Borders - 3 px - Symmetric checked color 2 #ffffff
Image - Add Borders - 1 px - Symmetric checked color 1 #5582ad
Step 25
Open tube wordart - mntext
Edit - Copy
Edit - Paste - Paste As New Layer on your working image
Activate the Pick Tool (K)![]() - Enter these values for positions X and Y on the Toolbar:
- Enter these values for positions X and Y on the Toolbar:
X:530.00 Y: 500.00
![]()
Note: With a font of your choice you may add your own text and position it wherever you like.
Step 26
Layers - New Raster Layer
Add your name or watermark
Layers - Merge - Merge All (Flatten)
Image - Resize - 900 pixels width (the height will adapt)
File - Export - Save as JPG file
***
I hope you enjoyed this tutorial.
~~~~~~~~~~
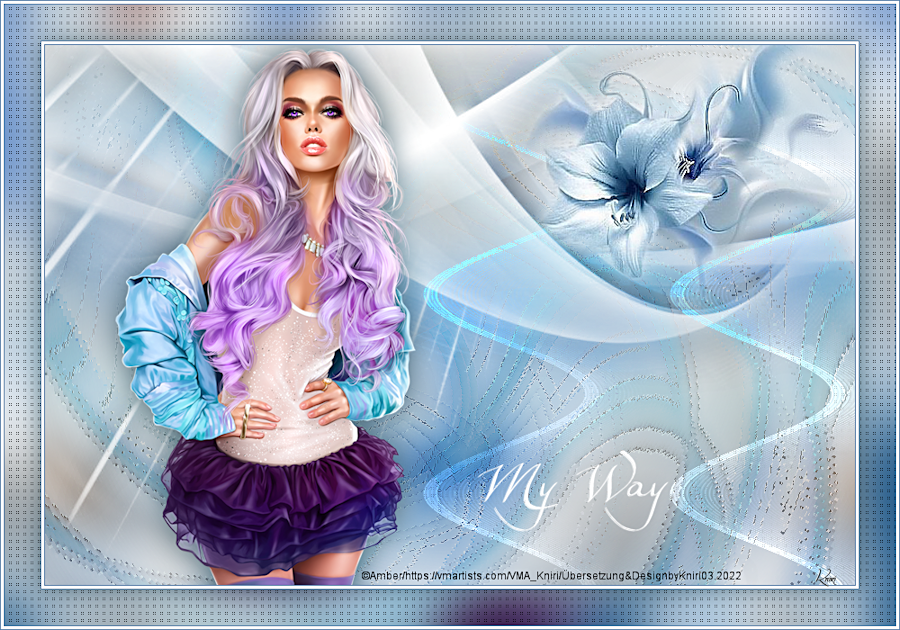
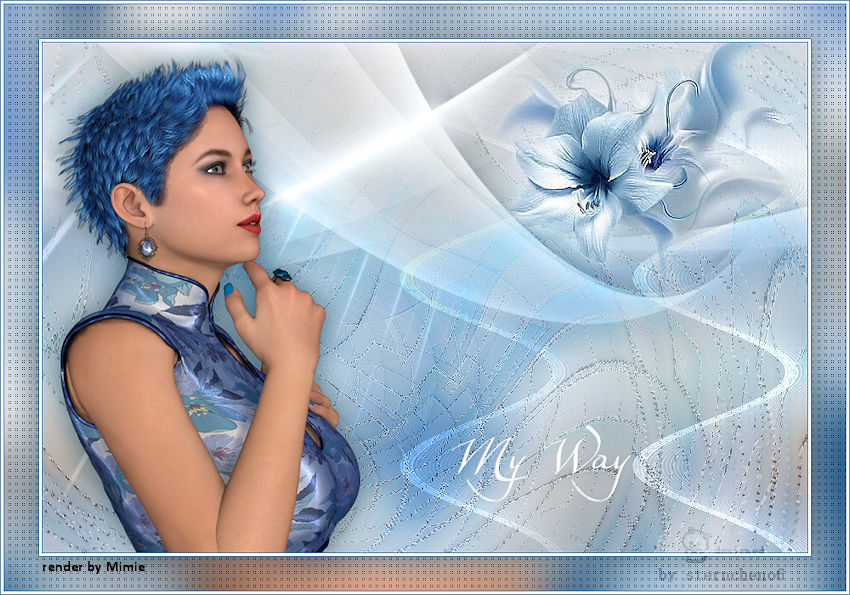
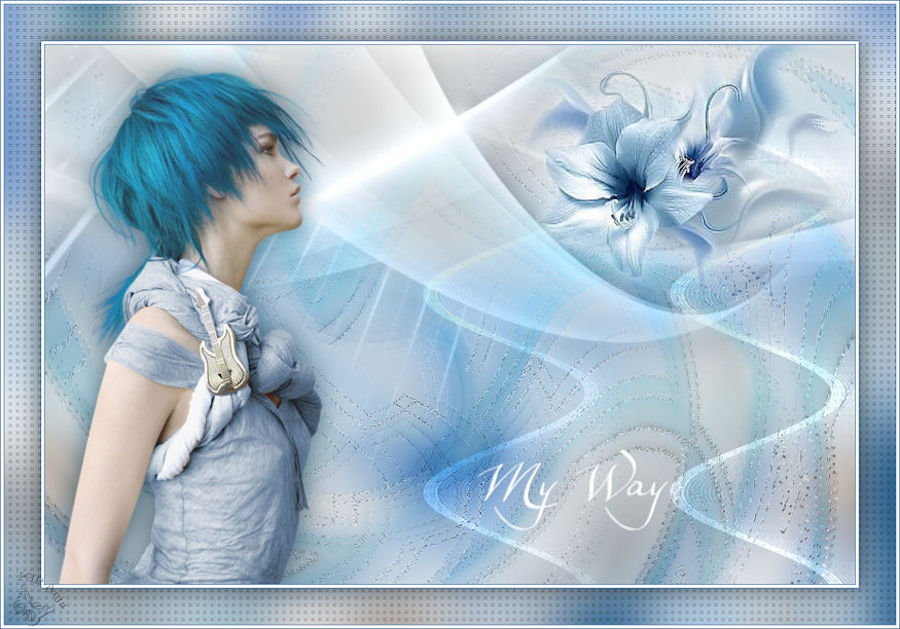
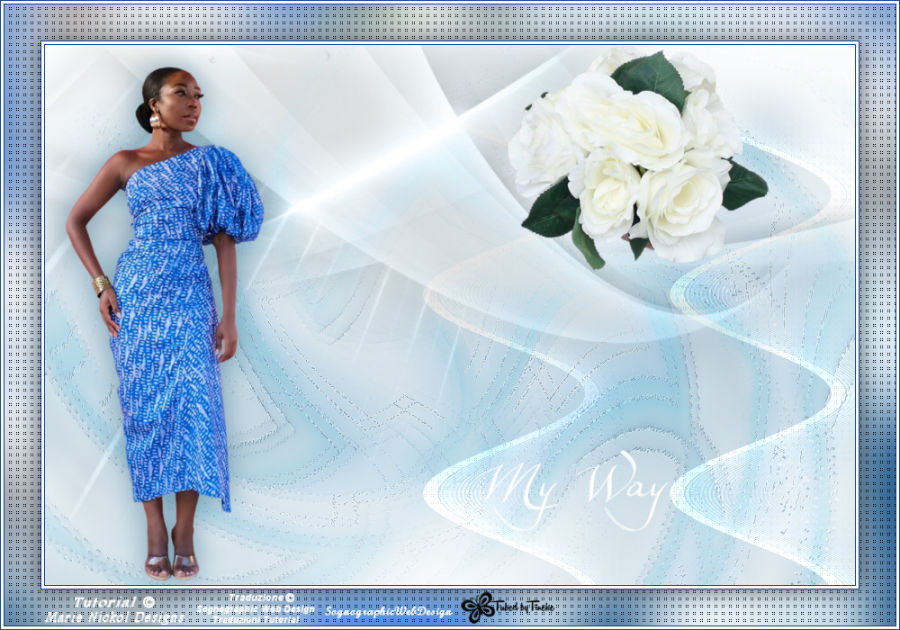
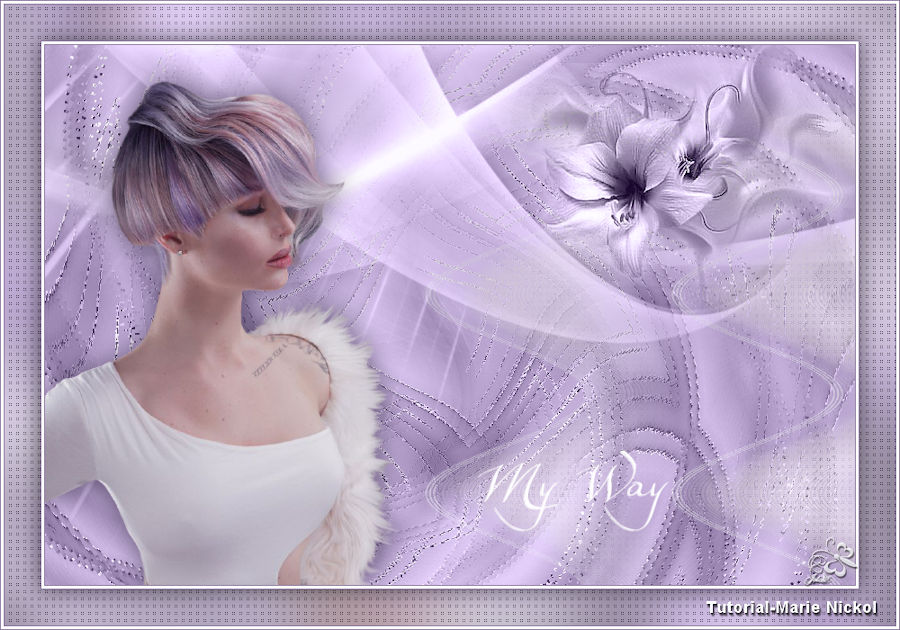
Your Versions
Thank you so much Kniri for your magnificent version
~~~~~~~~~~
Thank you so much Sternchen for your magnificent version
~~~~~~~~~~
Thank you so much Anja for your magnificent version
~~~~~~~~~~
Thank you so much Isabella (Sognografica) for your magnificent version
~~~~~~~~~~
Thank you so much Jolcsi for your magnificent version
~~~~~~~~~~
1 2
![]()